Installation Guide
Welcome to our installation guide! Whether you're a pro or trying it for the first time, we're here to help you create the perfect look with ease. Follow the steps, check out helpful tips, and let your hair shine!
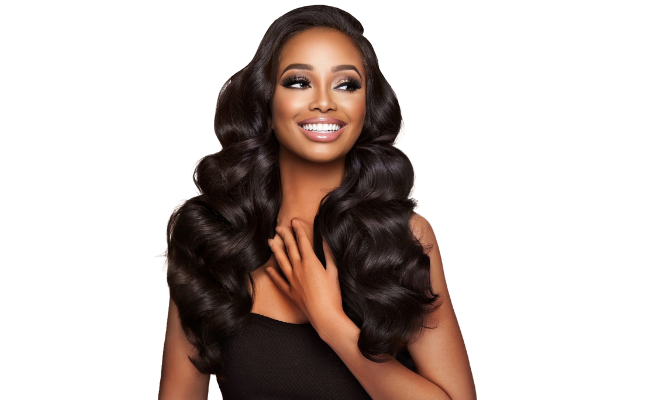
Installation guide for
HAIR EXTENSIONS
Weaves
This traditional method secures extensions to cornrows using a needle and thread, providing a durable, low-maintenance option with a natural appearance.
Suitable for: Individuals seeking a long-lasting solution that blends seamlessly with their natural hair.
1. Prepare Your Hair: Wash, deep condition, and braid your natural hair into cornrows.
2. Protection:
- Using a protective cap is optional but recommended to shield your natural hair and prevent needle damage during the sew-in process.
- After braiding, lightly oil your scalp between the braids with a non-greasy, lightweight scalp oil to maintain scalp hydration throughout the duration of the sew-in.
3. Sew-In Process:
- Use a curved needle and weaving thread.
- Sew around the weft instead of through it to maintain the integrity of the weft and reduce shedding.
- Start from the back and sew the weft onto the cornrows in horizontal layers.
- Avoid cutting the wefts whenever possible. If the wefts need to be cut, seal the ends with glue or sew them closed to prevent shedding.
- Ensure the rows of wefts are spaced evenly, with about half an inch of natural hair visible between each row to prevent bulkiness and promote airflow to the scalp.
- Knot the thread tightly at the start and end of each row to secure the wefts.
- Adjust the sewing to follow the natural curve of the head for a snug and comfortable fit.
4. Blend and Style:
- Cut and style the extensions as needed to match your desired look.
- If the texture of your natural hair does not match the weave extensions, consider using a closure or frontal for a seamless finish. Refer to the "Closures and Frontals Installation" section below for detailed guidance.
- If a leave-out is used, ensure the natural hair texture matches the extensions for seamless blending.
A non-invasive technique that uses small beads to attach extensions to natural hair, offering flexibility and a natural finish.
Suitable for: Individuals who want a versatile option without braids or glue.
Follow these steps:
1. Prepare Your Hair: Wash and detangle your natural hair thoroughly.
2. Section Your Hair: Divide your hair into small, neat sections.
3. Attach the Extensions:
- Use a threading tool to pull a small section of natural hair through a microlink bead.
- Insert the weft and clamp the bead securely with pliers.
4. Blend and Style:
- Ensure the microlinks are evenly distributed for a natural look.
1. Prepare Your Hair:
- Braid your natural hair or slick it back with a gel to create a flat base.
Apply a Protective Cap:
- Place a wig cap over your hair and secure it in place to protect your natural hair from glue.
2. Glue the Extensions:
- Apply bonding glue to the weft and attach it to the cap, working in layers.
- Alternatively, apply bonding glue directly to the cap and press the weft onto the glued area. This method provides a more secure base for certain styles.
3. Blend and Style:
- Trim and style the extensions for a polished look.
Clip-ins
This method offers a natural look with minimal effort, perfect for subtle to moderate length changes.
Suitable for: People who want an easy-to-use, temporary option for everyday or occasional use.
Follow these steps:
1. Prepare Your Hair: Lightly tease the roots where you plan to attach the clips to ensure a secure grip.
2. Section Your Hair: Part your hair horizontally starting from the nape. Pull up the lower part of your hair before attaching the first clip.
3. Attach the Clips:
- Open the clips and secure them to the teased sections of hair.
- Work your way up in layers for even distribution.
4. Blend and Style:
Use a flat iron or curling wand for straight or wavy textures. For curly textures, gently twist your natural hair with the extensions using your fingers or a curl cream.
Designed for drastic length changes, this method conceals natural hair almost completely while adding significant volume.
Suitable for: Those aiming for dramatic transformations with minimal natural hair exposure.
Follow these steps:
1. Prepare Your Hair:
Braid your natural hair into cornrows, leaving a small section out at the front to blend with the extensions.
2. Attach the Clips:
Secure the clips over the cornrows, starting at the nape and working upward.
3. Blend and Style:
Blend the leave-out section with the extensions to achieve a seamless look, and style the hair to match your desired texture.
Tape-ins
This classic installation technique sandwiches your natural hair between two tape pieces for a secure and natural look.
1. Prepare Your Hair: Ensure your hair is clean, dry, and free of oils.
2. Section Your Hair: Part your hair into clean, thin sections.
3. Attach the Extensions:
- Place one tape piece under a thin section of your hair and press another tape piece on top, sandwiching your natural hair between the two tapes.
- Use a tape press or flat pliers to firmly secure the tapes and ensure a strong bond.
4. Blend and Style:
- Style your hair to ensure a seamless blend.
Ideal for fine or thin hair, this method uses single-sided tape to attach the extensions while minimizing additional weight.
1. Prepare Your Hair: Ensure your hair is clean, dry, and free of oils.
2. Section Your Hair: Part your hair into clean, thin sections.
3. Attach the Extensions:
- Place one tape piece under a thin section of your hair.
- Apply single-sided tape to the adhesive side of the tape-in to secure it without adding weight to fine or thin hair.
- Use a tape press or flat pliers to firmly secure the tapes and ensure a strong bond.
4. Blend and Style: Style your hair to ensure a natural look.
Ponytails
1. Prepare Your Hair: Tie your natural hair into a ponytail or bun.
2. Attach the Ponytail:
- Wrap the extension around the base of your ponytail.
- Secure it with pins or velcro straps.
3. Blend and Style:
- Use styling tools or accessories to perfect the look.
1. Prepare Your Hair: Tie your natural hair into a ponytail or bun.
2. Attach the Ponytail:
- Use the comb attachment to secure the ponytail base.
- Tighten the drawstring for a secure fit.
3. Blend and Style:
- Use styling tools or accessories to enhance the look.
Installation Guide For
WIGS
Lace Wigs
Yes, we ship all over the world. Shipping costs will apply, and will be added at checkout. We run discounts and promotions all year, so stay tuned for exclusive deals.
It depends on where you are. Orders processed here will take 5-7 business days to arrive. Overseas deliveries can take anywhere from 7-16 days. Delivery details will be provided in your confirmation email.
You can contact us through our contact page! We will be happy to assist you.
U Part Wigs
Write a clear and concise answer to guide your customers.
Write a clear and concise answer to guide your customers.
V Part Wigs
Write a clear and concise answer to guide your customers.
Write a clear and concise answer to guide your customers.
Half Wigs
Write a clear and concise answer to guide your customers.
Write a clear and concise answer to guide your customers.